Archives for : tips and tricks

Poor man’s VPN using SSH and SOCKS proxy for MacOS

Add the following aliases to your .bash_profile:

alias socks_on="ssh -D 8666 -C -N -f -M -S ~/.socks.socket $USER@<your_office_gateway>; networksetup -setsocksfirewallproxystate Wi-Fi on;"
alias socks_off="networksetup -setsocksfirewallproxystate Wi-Fi off; ssh -S ~/.socks.socket -O exit $USER@<your_office_gateway>;"

Later you can start your tunnel with command

socks_on

and stop it with

socks_off


😉

ssh-copy-id key to other user than yourself?

There’s a good tool for copying ssh keys to remote host under your account: ssh-copy-id. This lets you copy your public key under your account on the remote server.

But what about other accounts? Let’s say you want to log in as root (with key-only auth method, of course)? How to copy key to root user’s .ssh/authorised_keys? One way to do it is to log as your ordinary user, make yourself root with sudo su -, open authorized_keys with editor, paste, save etc… Tedious? Yes.

That’s why there’s a good oneliner:


cat ~/.ssh/id_rsa.pub | ssh your_user@remote.server.com “sudo tee -a /root/.ssh/authorized_keys”


SailsJS and Waterline: native MongoDB queries and Waterline models

Here’s my experience with SailsJS, Waterline and MongoDB native queries. I like SailsJS and Waterline very much but there’s also room for improvement when things get serious.

There’s limitation in current Waterline that one cannot limit the fields in the output when MongoDB is used. Also the aggregation options are limited with Waterline. MongoDB on the other hand is very-very powerful database engine and once you learn how to aggregate then the possibilities seem endless.

My usecase is that I have to use native queries instead of Waterline’s but I also want the retrieved models have all those nice “instance methods” of Waterline model instances like “model.save()”. This example also gives you overview how to use native queries, aggregation.

So here’s very short guide to this. I hope it helps to save a couple of hours for other guys like me (who spent that time to figure it out:)).

Note! It uses another excellent, wonderful, genius etc pattern called Promises.

Custom headers from SailsJS API ignored by AngularJS app

Have you ever tried to return custom HTTP headers from your SailsJS backend REST API to your frontend AngularJS application and wondered why they don’t show up in AngularJS?

I had pretty standard case where I wanted to implement server side pagination for my data sets returned by the API. For that you need to return the total number of records in order to implement pagination properly in the frontend. I decided to return the total number of records in a custom header called “X-TotalRecords”. It is returned together with the response but it didn’t show up in AngularJS response:

.....    
.then(function(response){
    $log.debug(response.headers()) //does not show my custom header
}) 
..... 

After some googling around I found a solution. You need to create a custom SailsJS policy and send a special header “Access-Control-Expose-Headers” there. Let’s call the policy sendCorsHeaders.

Create a file sendCorsHeaders.js in policies/ folder:

    
module.exports = function (req, res, next) {
    res.header('Access-Control-Expose-Headers', sails.config.cors.headers);
    next();
};

As you can see it re-uses headers defined in your cors.js under config/ folder.

From now on you can retrieve your custom header in AngularJS $http service.

Accepting BDOC container upload from PUT method in SailsJS app

I just struggled with a complex problem of uploading application/bdoc (digital signature container) files to a SailsJS app and I want to share my story. I hope it will make the life easier for those who are working with digidoc and Signwise.

We at Prototypely are creating a solution that heavily uses digital signatures. Signwise is the preferred partner for handling containers and signing process. Signwise process states that they create the container and their system makes a HTTP PUT request to target system to put the newly created container back.

Standard file uploads are handled very nicely in SailsJS by great Skipper library.

However when it comes to uploading quite rare mime types like application/bdoc or application/x-bdoc then it needs some tweaking.

Open config/http.js and add custom body parser there and you’ll be able to accept BDOC files:

bodyParser: function (options) {
  return function (req, res, next) {
    if (req.get('content-type') != 'application/bdoc') {
      return next();
    }
    var bodyParser = require('body-parser').raw({type: 'application/bdoc'});
    return bodyParser(req, res, next);
  }
}

After that you’ll be able to save the file in your controller. Mind the req.body – this is the buffer that will be written down.

acceptBdocFile: function(req, res){
    var fileId = req.param('fileId');
    var tmpFile = process.cwd() + '/.tmp/' + fileId;
    fs.writeFileSync(tmpFile, req.body);
    return res.status(201).json();
} 

How to delete Magento maintenance.flag without FTP?

Sometimes Magento gets stuck in “Maintenance mode”. It means that there is maintenance.flag file in Magento’s root folder.
The standard maintenance mode of Magento is a bit “too universal” – it sets Magento backend (admin) to maintenance mode also. Once you’re in maintenance mode, it’s hard to get out of this if you don’t have access server’s shell.
Anyway – there is one option if you have not removed Magento Connect Manager (a.k.a /downloader). This program is be impacted by the maintenance.flag file. Log in to Connect Manager at /downloader and check/uncheck checkbox ““.

That’s it.

Setting node.js app default timezone

Timezones are … difficult. I can say that based on my >20 years programming experience. They pop up here and there and cause a good amount of headache. I won’t spend too much time here for timezones but I just give a quick tip how to set your SailsJS (or any NodeJS) app to use UTC (GMT) timezone by default.
During the years I’ve learn that it’s best to have everything in UTC in the business and DB layers as a rule of thumb (there are exceptions, of course).

It’s really simple to make your NodeJS app to have UTC as default timezone. Just export an environment variable before you run your app:

export TZ="UTC"
forever --watchDirectory ./ -l logs/log.log --watch app.js

How to ignore or include files by wildcards in a Magento tgz package

When you’re packing Magento extensions in Magento admin and want to ignore (or include) a file or directory then there’s a special syntax for it. Let’s say you want to exclude folder “tests” from the tgz package. Number signs (#) are used as wildcard placeholders. Add following line to “Ignore” field:

#tests/#
Your tests folder will be excluded from the tgz package.

PHPStorm and OSX Yosemite Java problem

Problem

I just upgraded to OSX Yosemite. It looks pretty cool and works fine. In addition to Java, CSS, Javascript we are writing a lot of PHP while develop data management solution MageFlow for Magento.

I noticed a problem when I tried to start my everyday IDE PhpStorm:

phpstorm_java


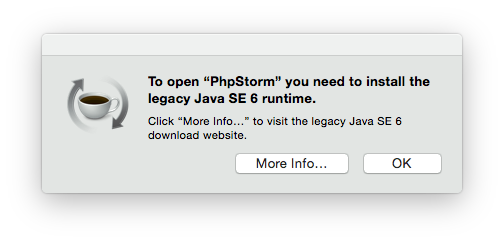
Stop! I just upgraded to a fresh, new OSX and I’m forced to install an almost 10 year old Java? Nope…

I have Java 8 installed to my Mac and I thought it would be cool to run PhpStorm on top of that one.

So I looked around and the solution is surprisingly simple.

Solution 1 (deprecated – see the update)

Open file /Applications/PhpStorm.app/Contents/Info.plist with your favorite editor (mine is vim)

Find the following tag:

<key>JMVVersion</key>

Below that one there should be

<string>1.6*</string>

or similar.

Replace 1.6* with

<string>1.8*</string>

Start PhpStorm.

😉


Important update

It’s important to know that changing the Info.plist file would break the application’s digital signature. There are consequences like the app asking for firewall permissions on each start and not the patches not being applied properly. See more info on JetBrains Support page.

In short you need to add the wanted Java version to a preference file instead of hacking application’s Info.plist.

In my case I created file ~/Library/Preferences/WebStorm9/idea.properties with contents:

JVMVersion=1.8*

This applies for WebStorm but it’s done the same way for all JetBrains IDE-s. Just change the app name in the path.

For PhpStorm put the file to:

~/Library/Preferences/WebIde80/idea.properties

Part 2: Continuous Integration server to package Magento Extension with a click from JIRA

Starting Magento Connect extension packaging process from JIRA

When I wrote the first part of Continuous Integration server to package Magento Extension I didn’t know how to make it work with a click from JIRA. As you may know in JIRA there’s a way to release versions and trigger Bamboo builds during this release process. That’s what I was aiming – to make it work from JIRA so that it would NOT require any technical knowledge from let’s say Project Manager or Release Manager. I didn’t know it yesterday but here at MageFlow we have a learning mindset. I know it today:)

First – there are now 2 build plans configured in our Bamboo for our MageFlowConnect extension:

  1. “continuous builds” or “CI builds” that are triggered by commits that are made to the git repository that contains MFX code.
  2. “release builds” or “manual builds” that are triggered by clicking “Release” in JIRA

There are 2 main problems with creating Magento extension packages automatically:

  1. when and how to update extension’s version number (in module’s etc/config.xml and in package.xml mentioned in previous post)
  2. how to update release notes inside package.xml. However this one is not mandatory and it’s not resolved yet by us either.

Prerequisites

Install xsltproc to your build server and configure an executable “XSLTProc” in Bamboo.

Updating version numbers

In Part 1 I’ve created a XSL stylesheet that does the job of replacing extension version number in package.xml. Exactly the same XSL can be used to replace version number in extension’s etc/config.xml, too.

In your “CI build” process you may want to have extension version number increased with every build automatically. So that’s what we do  – we set the extension version number to that already defined in package.xml with added Bamboo build number. For example if package.xml contains version number 1.1.3 and Bamboo build # is 43 then the final version number of that extension build would be 1.1.3.43.

In order to replace version numbers in the “CI build” process add following 2 XSLTProc tasks to the build job in Bamboo:

  1. –output public/var/connect/package.xml –stringparam package_version ${bamboo.buildNumber} utils/update_version.xsl public/var/connect/package.xml
  2. –output public/app/code/community/Mageflow/Connect/etc/config.xml –stringparam package_version ${bamboo.buildNumber} utils/update_version.xsl public/app/code/community/Mageflow/Connect/etc/config.xml

First one appends ${bamboo.buildNumber} to existing version number (e.g 1.1.3) in package.xml while second does the same in etc/config.xml

In order to replace version numbers in the “Release build” (build triggered from JIRA) process add following 2 XSLTProc tasks to the build job in Bamboo:

  1. –output public/var/connect/package.xml –stringparam package_version ${bamboo.jira.version} utils/update_version.xsl public/var/connect/package.xml
  2. –output public/app/code/community/Mageflow/Connect/etc/config.xml –stringparam package_version ${bamboo.jira.version} utils/update_version.xsl public/app/code/community/Mageflow/Connect/etc/config.xml

First replaces version in package.xml with the version number specified in JIRA (let’s say 1.1.4) while second does the same in extension’s etc/config.xml

That’s it!:)

Please feel free to comment or send me questions directly.