Archives for : security

ssh-copy-id key to other user than yourself?

There’s a good tool for copying ssh keys to remote host under your account: ssh-copy-id. This lets you copy your public key under your account on the remote server.

But what about other accounts? Let’s say you want to log in as root (with key-only auth method, of course)? How to copy key to root user’s .ssh/authorised_keys? One way to do it is to log as your ordinary user, make yourself root with sudo su -, open authorized_keys with editor, paste, save etc… Tedious? Yes.

That’s why there’s a good oneliner:


cat ~/.ssh/id_rsa.pub | ssh your_user@remote.server.com “sudo tee -a /root/.ssh/authorized_keys”


Voting with Mobile-ID in Estonia – how it looks

ID-infrastructure in Estonia – general info

As you may know Estonia has really great digital identity infrastructure. We can sign fully legal documents (I mean ALL documents) either with our ID-card or with our Mobile-ID. While the first is more common the latter may need some explanation and examples. In both cases there are certificates on the chip (on the SIM-card) and they’re protected with strong crypto. The private certs and keys never leave the chip. For proper authentication 2 things are needed:
– your certificate (on the chip)
– your PIN-code that unlocks the private key on the chip

So the PIN code and the chip alone are pretty useless and thus secure. So much about theory. Now some examples.

Voting with Mobile-ID

I’m on OSX so the examples are based on that fact.

First you download an app from the official elections website https://www.valimised.ee/mac

Open the app and there you see choices for authentication. They’re pretty self explainable.

v1When I click on mobiil-ID (Mobile-ID) the following dialog appears. It asks for my mobile phone number in order to send me Mobile-ID authentication message. The phone number entered is not mine. Don’t use it:)

v2


After clicking on big blue button “Saada” (Send) the following waiting dialog appears. During that dialog is visible I get a message to my phone that opens special SIM-card application and asks for my Mobile-ID PIN-1:v3

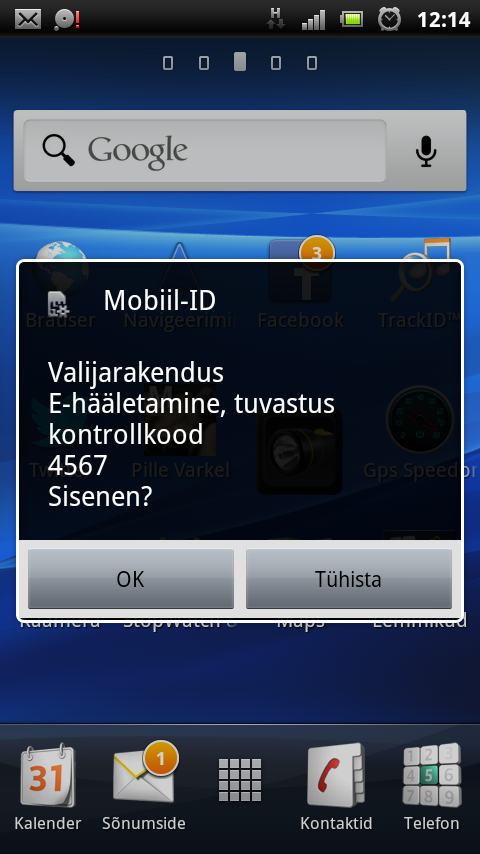
On my mobile phone I see dialog like this:


screenshot_2013-10-10_1214


Mind the numbers 5304 and 4567. These don’t match in my example because I made the screenshots from different sessions. These must match, otherwise something’s fishy and someone else might have sent you authentication request (not good).

I enter my PIN-1 on my mobile and that opens my authentication certificate. Background magic happens in ID-infra and I see next screen in my voting app:

v4


It welcomes me with my name and my personal ID-code (blurred). Then it explains that I can vote and blahblah… In bold it’s important message: it says that I’ve already voted. The trick is that I can vote unlimited times electronically but only the last vote is counted! Even better – if I change my mind then I can got and vote on the real (physical) elections day and then the vote made there will count. But who bothers going out if you can vote like this?:)

I click “Hääletama” (To voting) and I see next screen:

v5


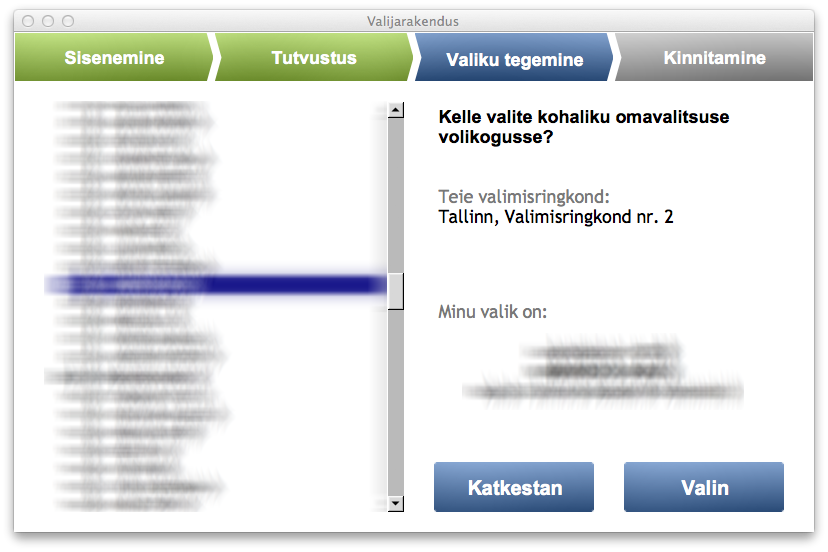
This is the list of candidates. I make my choice and I see it like this:

v6


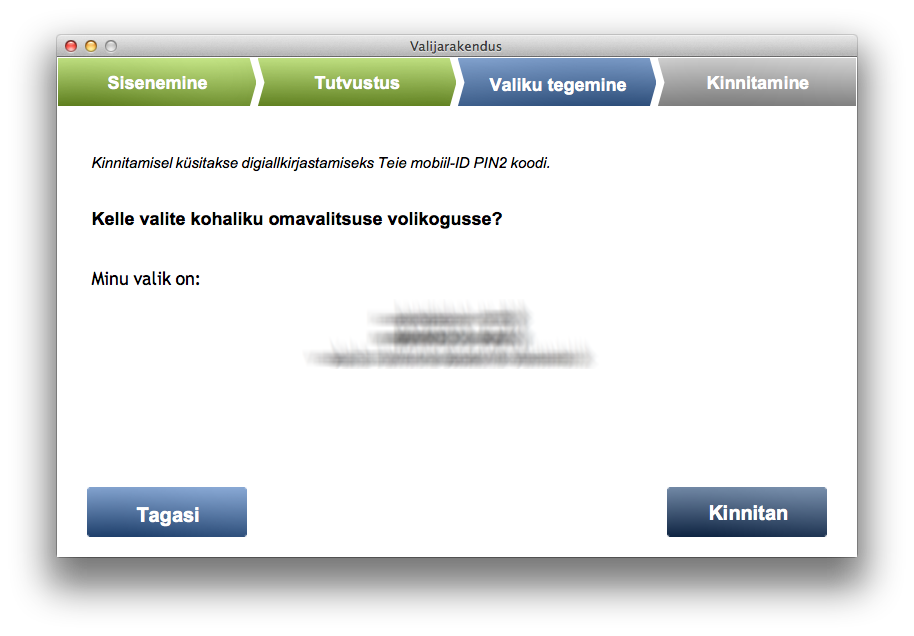
I don’t want to advertise anyone so it’s blurred. Then I have button “Valin” (Vote). After clicking on that I see confirmation screen:

v7


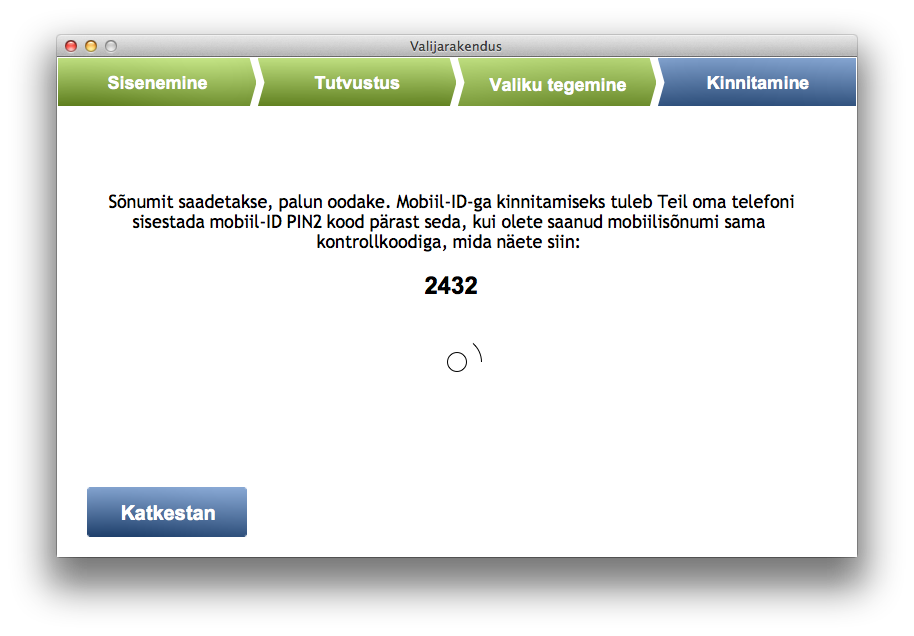
After I click on “Kinnitan” (Confirm) a second message is sent to my mobile phone. I see waiting screen like this:

v8


On my mobile I see similar screen as above but this time I’m asked my PIN-2 code which is meant for opening my signing (signature) certificate. After entering PIN-2 I see confirmation screen like this:


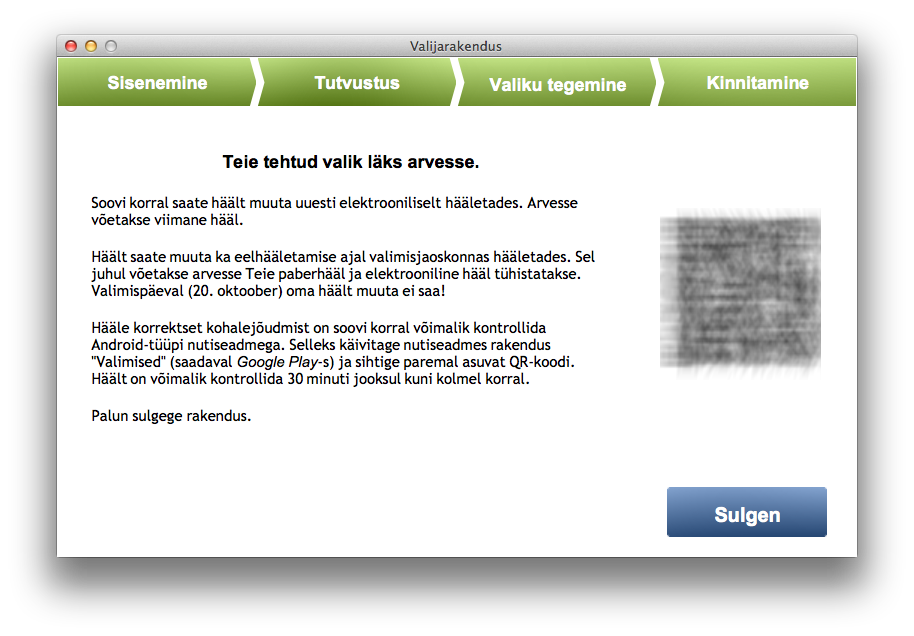
v9

It shows me a QR code that I could use to verify if my vote was accepted and stored properly. It can be verified 30 minutes after voting and max 3 times for security reasons. That’s why I blurred the QR also.

That’s it. It takes max 5 minutes if you know who’s your preferred candidate!:)

I hope whole Europe would adopt our digital ID infrastructure soon.

Go, Estonia!

Building GNUPG for PHP 5.5 on OSX

It’s quite tricky to build gnupg php extension on OSX. I’m using homebrew, so I installed necessary dependencies first:

brew install gpgme

This goes well as most things with brew.

Then I’m trying to install GNUPG PHP PECL extension as the instructions tell me to do:

sudo pecl install gnupg

Bang!!!

I get weird errors like these:

duplicate symbol _gnupg_keylistiterator_class_entry in:
.libs/gnupg.o
.libs/gnupg_keylistiterator.o
duplicate symbol _gnupg_class_entry in:
.libs/gnupg.o
.libs/gnupg_keylistiterator.o
ld: 2 duplicate symbols for architecture x86_64
clang: error: linker command failed with exit code 1 (use -v to see invocation)
make: *** [gnupg.la] Error 1
ERROR: `make' failed

“Tough luck”, I think. But wait… After some googling around PHP bugs I got some hints.

So here’s what you got to do:

  1. download pecl extension source code
  2. fix 2 lines in .h and .c files
  3. phpize, configure and make
  4. configure PHP extension
  5. == Profit
pecl download gnupg

In my case it downloads files to /Users/sven/soft/php-5.5.4/ext/gnupg-1.3.3/gnupg-1.3.3.tgz

Unpack the archive:

tar xzf gnupg-1.3.3/gnupg-1.3.3.tgz
cd gnupg-1.3.3

Open file php_gnupg.h and add comments and explanation around line 50:

/* moved next line to gnupg.c
zend_class_entry *gnupg_class_entry;
 */

Copy the line zend_class_entry *gnupg_class_entry; to buffer. Save and exit.

Open file gnupg.c:

Find lines (around 177) and paste copied buffer so it looks like this:

zend_class_entry *gnupg_class_entry;
/* {{{ objects_new */
zend_object_value gnupg_obj_new(zend_class_entry *class_type TSRMLS_DC){

Do similar things with files gnupg_keylistiterator.c and php_gnupg_keylistiterator.h.

Open file  php_gnupg_keylistiterator.h around line 69:

/* moved next line to gnupg_keylistiterator.c
 zend_class_entry *gnupg_keylistiterator_class_entry;
 */

Copy line zend_class_entry *gnupg_keylistiterator_class_entry; to buffer. Save and exit.

Open file gnupg_keylistiterator.c around line 72 and make it look like this by pasting buffer:

zend_class_entry *gnupg_keylistiterator_class_entry;
/* {{{ keylistiterator_objects_new */
zend_object_value gnupg_keylistiterator_objects_new(zend_class_entry *class_type TSRMLS_DC){

Save and exit.

Configure, build and install: ./configure make clean && make make install

Now you should have php extension gnupg.so somewhere. I have it in my Cellar:

/usr/local/Cellar/php55/5.5.4/lib/php/extensions/no-debug-non-zts-20121212/gnupg.so

Wherever it is, copy the path to buffer.

Open a new file (your php-s conf.d may be somewhere else!)

vim /usr/local/etc/php/5.5/conf.d/ext-gnupg.ini

And add following lines there:

[gnupg]

extension="/usr/local/Cellar/php55/5.5.4/lib/php/extensions/no-debug-non-zts-20121212/gnupg.so"

Save and exit. Be sure to replace path if your gnupg.so is somewhere else.

Test your php:

php --ri gnupg

It should display something like this:

gnupg
gnupg support => enabled
GPGme Version => 1.4.3
Extension Version => 1.3.3-dev

Thanks!