Archives for : general

2 useful scripts for managing your GIT repository

First – GIT is not good at storing large and changing binary files (like images, mp3-s etc). It’s not meant for this. Don’t use it for this. Anyway, sometimes things happen and you have got some large images into your repository and the repo is growing and growing and growing…

I have published 2 scripts that help to manage your GIT repository. First one helps to find large files from your repository and the second one helps to remove these from the whole GIT repository history. If you thought that git rm would remove it or make your repository smaller then think twice:) It’s much more complex than that. If you have a distributed repository that has large binaries in it then you’re in bigger trouble. This case is not covered where although there are some methods to shrink those distributed repos, too. But it’s beyond this article’s scope.

Script for finding files:

Script for removing files:

How to create headless virtualbox machine with Debian Wheezy

I’ve created a small helper script for those who want to be able to create VirtualBox virtual machine from command line via SSH and RDP.

Prequisites

As a prerequisite you need to download Debian’s network install CD image.

The script

Here’s the script and I’ll explain it below line by line:

How it works?

In short it works so that you run this script in your existing Linux and you give virtual machine name as the only parameter. It creates a new virtual machine with pretty safe values that all can be changed later (e.g amount of memory).

First we do initialization, check the scripts arguments and assign the first argument as VMNAME variable:

if test $# != 1; then
echo "Usage: $0 vm_name"
exit 0
fi
VMNAME=$1

Then we create and register new virtual machine of type 64bit Debian:

vboxmanage createvm --name $VMNAME --ostype Debian_64 --register

Then we allocate RAM, set power management, set DVD as first booting device, set network in bridged mode and we also specify that the machine would have 2 CPU-s with possibility to hotplug CPU-s:

vboxmanage modifyvm $VMNAME --memory 512 --acpi on --boot1 dvd --nic1 bridged --bridgeadapter1 eth0 --nictype1 virtio --cpus 2 --cpuhotplug on

After that hard drive image is created with size of 4 gigabytes. Make it larger if you have plenty of disk space handy.

vboxmanage createhd --filename ~/VirtualBox\ VMs/testvm/$VMNAME-disk01.vdi --size 4096 --variant Standard

Then we create 2 controllers, one for harddisks (SATA) and the other for CD/DVD (IDE):

vboxmanage storagectl $VMNAME --name "SATA controller" --add sata
vboxmanage storagectl $VMNAME --name "IDE controller" --add ide

Then we attach the newly created hard disk to the controller:

vboxmanage storageattach $VMNAME --storagectl "SATA controller" --port 0 --device 0 --type hdd --medium ~/VirtualBox\ VMs/$VMNAME/$VMNAME-disk01.vdi

As a last thing we attach the downloaded Debian 7 network installation CD image:

vboxmanage storageattach $VMNAME --storagectl "IDE controller" --port 1 --device 0 --type dvddrive --medium /mnt/raid/soft/debian-7.2.0-amd64-netinst.iso

… and we start the virtual machine:

vboxheadless -s $VMNAME &

You’ll be displayed a message similar to this one:

VRDE server is listening on port 3389.

Open a Remote Desktop Client and connect to your host machine’s IP and port 3389. You will see Debian’s installation screen. Install it and off you go!:)

Later you may want to set the default boot device to harddisk instead of DVD:

vboxmanage modifyvm $VMNAME --boot1 disk

Voting with Mobile-ID in Estonia – how it looks

ID-infrastructure in Estonia – general info

As you may know Estonia has really great digital identity infrastructure. We can sign fully legal documents (I mean ALL documents) either with our ID-card or with our Mobile-ID. While the first is more common the latter may need some explanation and examples. In both cases there are certificates on the chip (on the SIM-card) and they’re protected with strong crypto. The private certs and keys never leave the chip. For proper authentication 2 things are needed:
– your certificate (on the chip)
– your PIN-code that unlocks the private key on the chip

So the PIN code and the chip alone are pretty useless and thus secure. So much about theory. Now some examples.

Voting with Mobile-ID

I’m on OSX so the examples are based on that fact.

First you download an app from the official elections website https://www.valimised.ee/mac

Open the app and there you see choices for authentication. They’re pretty self explainable.

v1When I click on mobiil-ID (Mobile-ID) the following dialog appears. It asks for my mobile phone number in order to send me Mobile-ID authentication message. The phone number entered is not mine. Don’t use it:)

v2


After clicking on big blue button “Saada” (Send) the following waiting dialog appears. During that dialog is visible I get a message to my phone that opens special SIM-card application and asks for my Mobile-ID PIN-1:v3

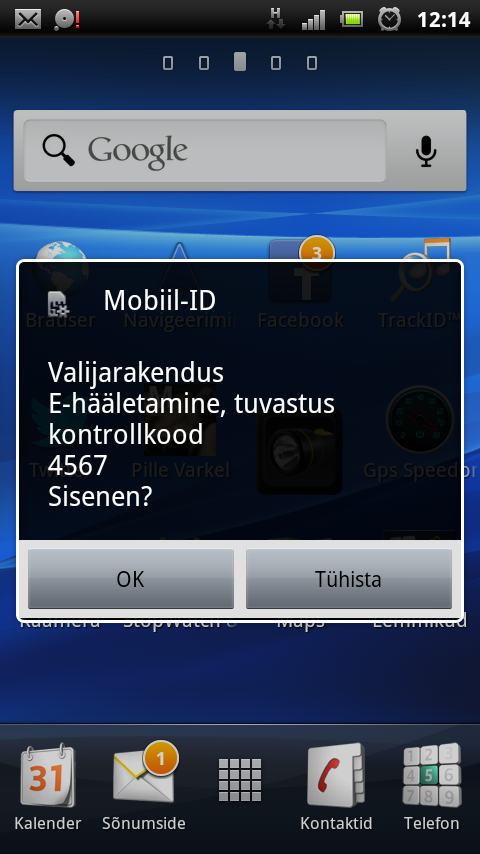
On my mobile phone I see dialog like this:


screenshot_2013-10-10_1214


Mind the numbers 5304 and 4567. These don’t match in my example because I made the screenshots from different sessions. These must match, otherwise something’s fishy and someone else might have sent you authentication request (not good).

I enter my PIN-1 on my mobile and that opens my authentication certificate. Background magic happens in ID-infra and I see next screen in my voting app:

v4


It welcomes me with my name and my personal ID-code (blurred). Then it explains that I can vote and blahblah… In bold it’s important message: it says that I’ve already voted. The trick is that I can vote unlimited times electronically but only the last vote is counted! Even better – if I change my mind then I can got and vote on the real (physical) elections day and then the vote made there will count. But who bothers going out if you can vote like this?:)

I click “Hääletama” (To voting) and I see next screen:

v5


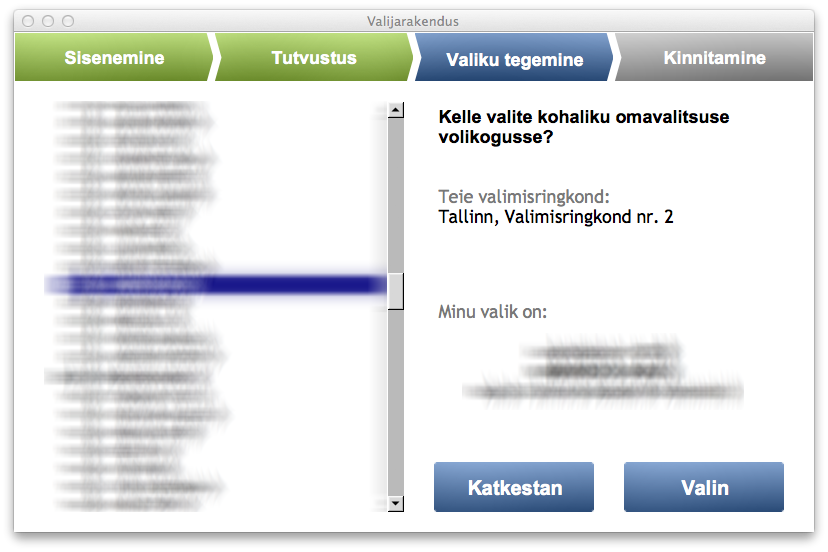
This is the list of candidates. I make my choice and I see it like this:

v6


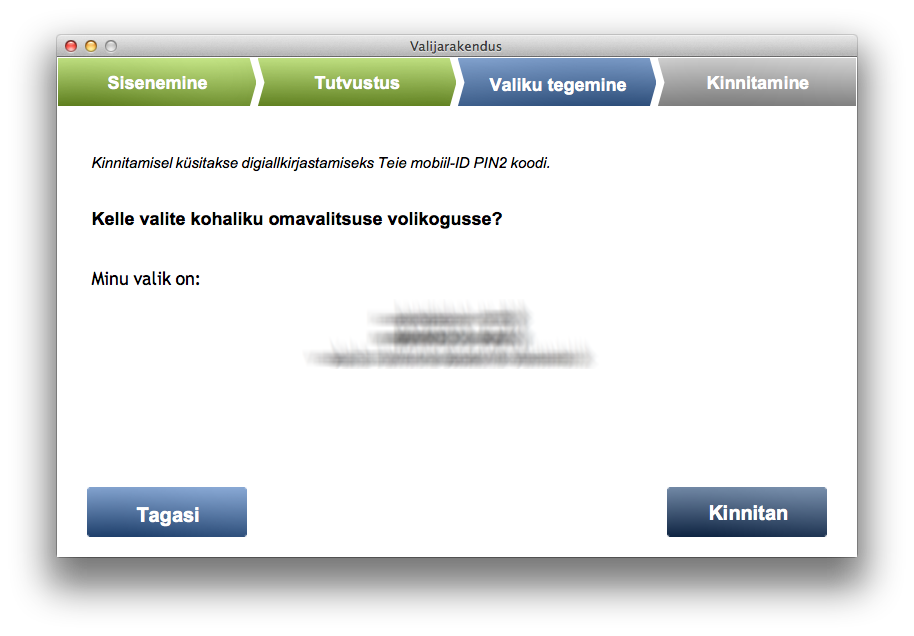
I don’t want to advertise anyone so it’s blurred. Then I have button “Valin” (Vote). After clicking on that I see confirmation screen:

v7


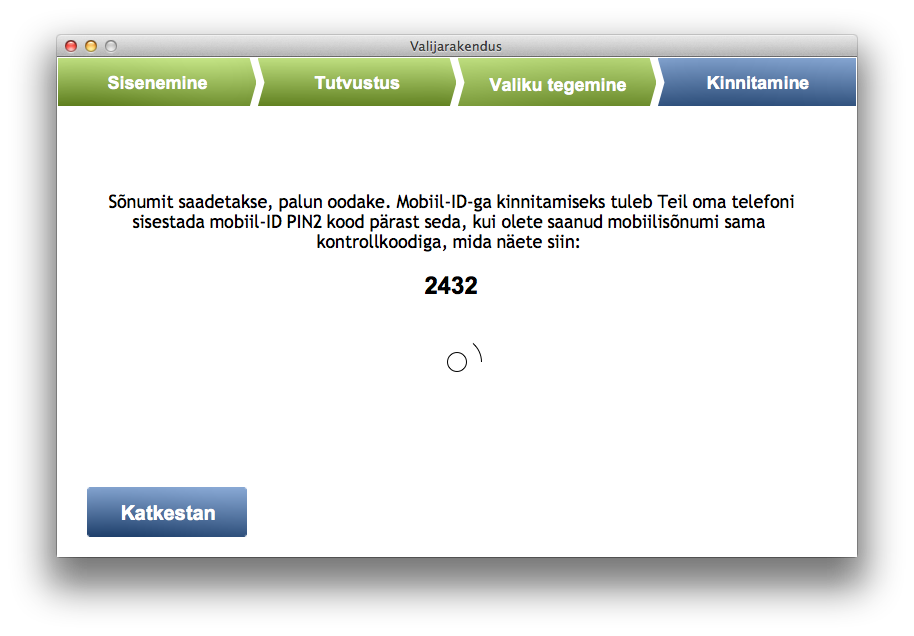
After I click on “Kinnitan” (Confirm) a second message is sent to my mobile phone. I see waiting screen like this:

v8


On my mobile I see similar screen as above but this time I’m asked my PIN-2 code which is meant for opening my signing (signature) certificate. After entering PIN-2 I see confirmation screen like this:


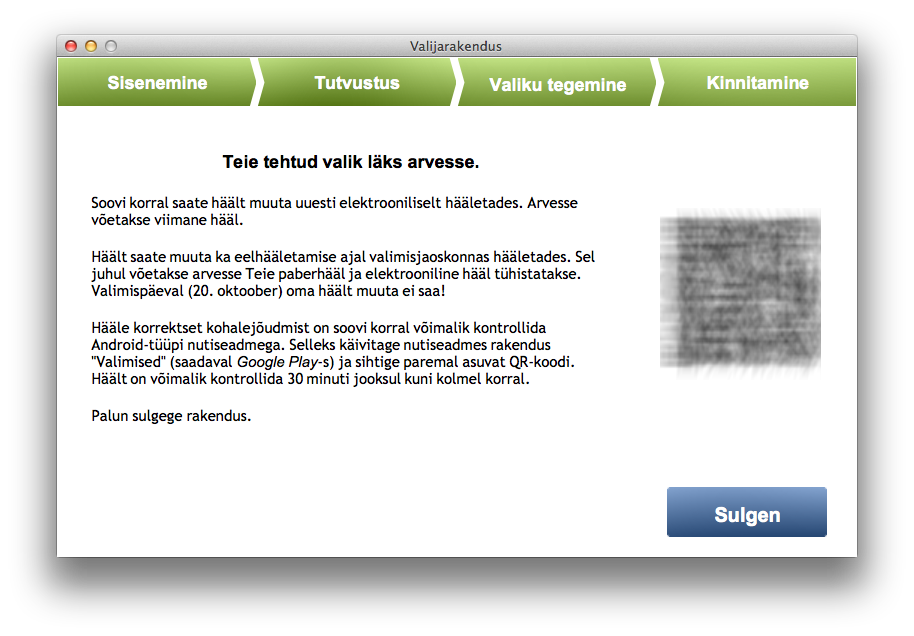
v9

It shows me a QR code that I could use to verify if my vote was accepted and stored properly. It can be verified 30 minutes after voting and max 3 times for security reasons. That’s why I blurred the QR also.

That’s it. It takes max 5 minutes if you know who’s your preferred candidate!:)

I hope whole Europe would adopt our digital ID infrastructure soon.

Go, Estonia!

Digital carbage and how to reduce it

Digital carbage

I’m afraid we will drown into digital carbage one day. That day is not necessarily in the far future but it can be this week or next.
One of the biggest soure of digital carbage is corporate e-mails with attachments. In every corporation, in every project there are working groups that still (in the year 2013) share a lot of information via e-mail. These people often add information to e-mails in form of attachments that makes it worse.

Attachments and versions

The problem with sending e-mail attachments is that when you send it to n persons you would instantly create at least n+2 different versions of the file. The situation is even worse if you added multiple attachments to your e-mail that you’re going to send – let’s say to 5 colleagues (3 from your office + 2 contractors or whoever).

By doing that you will create following versions of your file(s):
– one in each recipient’s mailbox (ouch – which one is original now?) – that is n
– one on your harddisk (so-called original) – that is n+1
– one in your sent-mail folder (is that original?) – that is n+2

When each recipient saves the attachment(s) from e-mail to harddisk more versions will be added.

My question is – which version is correct?

The solution

The solution is elegantly simple – use cloud services and shared documents. There are a number of such services while most popular are Google Drive and Microsoft Skydrive. Even Dropbox would work however it could impose some file locking issues. I know about corporate policies and rules (I worked at Ericsson for many years) but this is no excuse for polluting the digispace.
One document in one place shared to those who have to work with that. Easy. Simple. Done.
Any thoughts on that?

Logging PHP errors in the same folder with Magento error logs

Here’s another post regarding logging…

How to log PHP errors to the same folder than Magento error logs?

It’s quite simple with Nginx and PHP5-FPM. In Nginx virtual host configuration file there is quite likely block like that:

location ~ .php$ {
if (!-e $request_filename) { rewrite / /index.php last; }
fastcgi_pass unix:/var/run/php5-fpm.sock;
fastcgi_param HTTPS $fastcgi_https;
fastcgi_param SCRIPT_FILENAME $document_root$fastcgi_script_name;
fastcgi_param MAGE_RUN_CODE ee;
fastcgi_param MAGE_RUN_TYPE website;
fastcgi_read_timeout 600;
include /etc/nginx/fastcgi_params;
}

In order to make PHP error logs go to the same folder than Magento’s (/var/log/… add following lines to your virtual host configuration block:

    fastcgi_param   PHP_VALUE "log_errors=on";
fastcgi_param PHP_VALUE "display_errors=off";
fastcgi_param PHP_VALUE "error_log=$document_root/var/log/php_errors.log";

These are standard PHP directives.
log_errors – this one states that erros must be logged
display_errors – it’s always good to keep it off anywhere else than in your local development machine
error_log – this does the trick. It forces PHP logs for current virtual host to var/log folder under your Magento instance folder.

So the final block should look like this:

location ~ .php$ {
if (!-e $request_filename) { rewrite / /index.php last; }
fastcgi_pass unix:/var/run/php5-fpm.sock;
fastcgi_param HTTPS $fastcgi_https;
fastcgi_param SCRIPT_FILENAME $document_root$fastcgi_script_name;
fastcgi_param MAGE_RUN_CODE ee;
fastcgi_param MAGE_RUN_TYPE website;
fastcgi_read_timeout 600;
fastcgi_param PHP_VALUE "log_errors=on";
fastcgi_param PHP_VALUE "display_errors=off";
fastcgi_param PHP_VALUE "error_log=$document_root/var/log/php_errors.log";
include /etc/nginx/fastcgi_params;
}

Restart nginx and there you go. You can now tail or less the logs from /var/log/php_errors.log

Magento solution development in distributed environment

Background

Magento solutions get bigger and more complex, at least here at Eepohs. Magento development requires multiple displines like Frontend Development (JS, CSS, HTML, XML etc), Backend Development (PHP, JS, XML etc), System Integration (JSON, XML, REST, SOAP, (s)FTP etc…). So it’s quite obvious that Magento development is rather teamwork than a play of single freelancers. Freelancers can take your solution to some limit but sooner or later you need to hire a team that can support solution and take it further on.

Tools

There are a couple of tools that are crucial for teamwork and especially important when your team is not sitting together but is distributed in the room and possibly in time also. The tools for successful teamwork are:
– issue management tool – JIRA
– version control tool – GIT
– communication tool – Skype
– an IDE – Netbeans

Processes

When you have more than 1 developer you need a process. In fact you’d need a process when you’re working alone, too but it’s not that stringent in this case.
You have several processes while doing development:
– version control process and strategy
– issue management process
– general workflow
– development itself – writing code, chasing bugs, debugging etc.
– quality assurance (QA)
– deployment process

The latter seems to be quite tough because there’s a lot to be deployed between different stages and instances.
There are 4 stages (and n different Magento instances in each) in Magento development cycle
– development (local developer machine, local server)
– testing (internal testing by the QA team)
– staging or pre-live (pre-live testing by the QA team and the customer)
– live

Deployment of changes


A note about popular alternative – Subversion

Subversion is not good for Magento development for 2 reasons:
  1. it must be connected to central server. So you cannot version your files while working offline
  2. svn creates its own special control folder .svn with a lot of extra files inside every folder in Magento. Magento codebase is huge and svn creates a very big extra overhead for your filesystem. It makes it painfully slow and tedious.
  3. … I won’t start rant about merging in svn and git here…:)
  4. And yes – I have used svn, A LOT. So I know what I’m talking about:)

Magento specific issues a.k.a the Bad News

Attribute sets and attributes

How to manage attribute set and attribute migration between 4 stages described above?

The 2 above are actually quite simple to resolve. Magento offers excellent tools for that – install/update scripts. Just add your attributes and sets via install/update scripts and they will get to all environments automatically when code is deployed there.

Stores and Content

Store is the most crucial entity. Everything is depending on that, even configuration and content.

Configuration

That’s a tough one. How to version configuration? How to move conf changes from one Magento to the other?

Magento Deployment tools a.k.a the Good News

There’s a cure for all these issues above, though… I’ll shed some light to available tools in the upcoming posts.

A few thoughts about code quality

While working with Magento I see a lot of 3rd party software (Magento extensions). I must say that the code quality in general is very poor. It’s not that poor as in WordPress in the old days but it’s bad. I’m not even talking about following Magento Coding Standard. I’m talking about simple and basic things:

  1. PHP code that produces ERR in Magento log is to be considered broken. 
  2. PHP code that produces WARN in Magento log is to be considered nearly broken and dangerous.
  3. HTML code that does not validate is to be considered broken.
  4. JS is simple – if some JS is broken on they thru parsing then very likely the rest of it (all other libs, scripts) won’t be parsed correctly. It’s very visible in the frontend.
I cannot accept it. 
What to do? Educate yourself, check your code, use CodeSniffer, write Unit Tests and check the logs.

Upcoming topics in Measure9

In order to keep interest high I’d like to shed some light to upcoming topics at Measure9:

  • Magento Unit testing and Continuous Integration with Atlassian Bamboo CI
  • Automated acceptance testing in a Magento Development Project (w behat, mink, Gherkin)
  • Syncing content and configuration between Magento instances
  • Tools used in Magento development projects
  • Processes that lead to successful Magento projects
  • and much more…
Thx,
Sven \m/

Standardized order export format for Magento

Background, rationale

Sometimes I dream that all integration processes would be standardized… Currently it’s not quite there yet but let’s do some first steps towards it.
I work a lot with Magento, architecture, analysis, integrations. Every customer thinks that he’s so special and to some extent they are. But they’re not when it comes to integrations. I want all customers to be the same when it comes to API-s, schemas, protocols. Not all external systems (ERP-s, accounting, shipping providers etc) provide an API to send orders so files are still needed for integration.

Magento Order XML Export Schema

In order to start standardizing order exporting from Magento I’ve created a XML schema that can be used to create and validate produced order XML file on both ends. It’s important to validate XML on the receiver’s end, too. It allows the receiving system to notice errors in XML format earlier and send notifications to sending system so that actions can be taken. When you need your orders to be imported to your ERP then you don’t want hear “silence” for weeks but you need your files moving all the time.
The idea behind XML Export is very simple – whenever an order is placed a file is generated and after that it’s up to other extensions and systems to do anything with that file.
Here is the schema:
< ?xml version="1.0" encoding="UTF-8"?>
          elementFormDefault=”qualified” targetNamespace=”http://eepohs.com/schemas/dx/order”           xmlns=”http://eepohs.com/schemas/dx/order”>


                          use=”required” fixed=”2.0″ />


                        minOccurs=”1″>
           
           
                        type=”xs:dateTime”>


                        minOccurs=”1″>
           
           
                        minOccurs=”1″>
           
           
                        minOccurs=”1″>
           
           
                        minOccurs=”1″>
           
           
                        minOccurs=”1″>
           
           
                        maxOccurs=”1″ minOccurs=”0″>


                        minOccurs=”1″>
           
           
                        maxOccurs=”1″ minOccurs=”0″>
           
           
                        maxOccurs=”1″ minOccurs=”0″>
           
           
                        minOccurs=”0″>
           
           
                        minOccurs=”0″>


                        minOccurs=”1″>
           
           
                        minOccurs=”1″>
           
           
                        minOccurs=”1″>
           
           
                        minOccurs=”1″>
           
           
                        minOccurs=”0″>


                        minOccurs=”1″>
           
           
                        minOccurs=”0″>
           
           
                        minOccurs=”0″>


                        minOccurs=”1″>
           
           
                        minOccurs=”0″>
           
           
                        minOccurs=”0″>


                        type=”xs:dateTime” maxOccurs=”1″ minOccurs=”0″>


Here is that schema for download:
This is the first draft.

More information about outputted XML and the simple order export extension will be posted here soon.

Feedback is welcome!